
SwingCast supports two different modes:
Standalone Mode: In standalone mode, the user uses only one device to record and has the option of viewing the video by itself or comparing it side by side with an imported model swing video. The viewer can watch both options on either the device itself or a Google Chromecast.
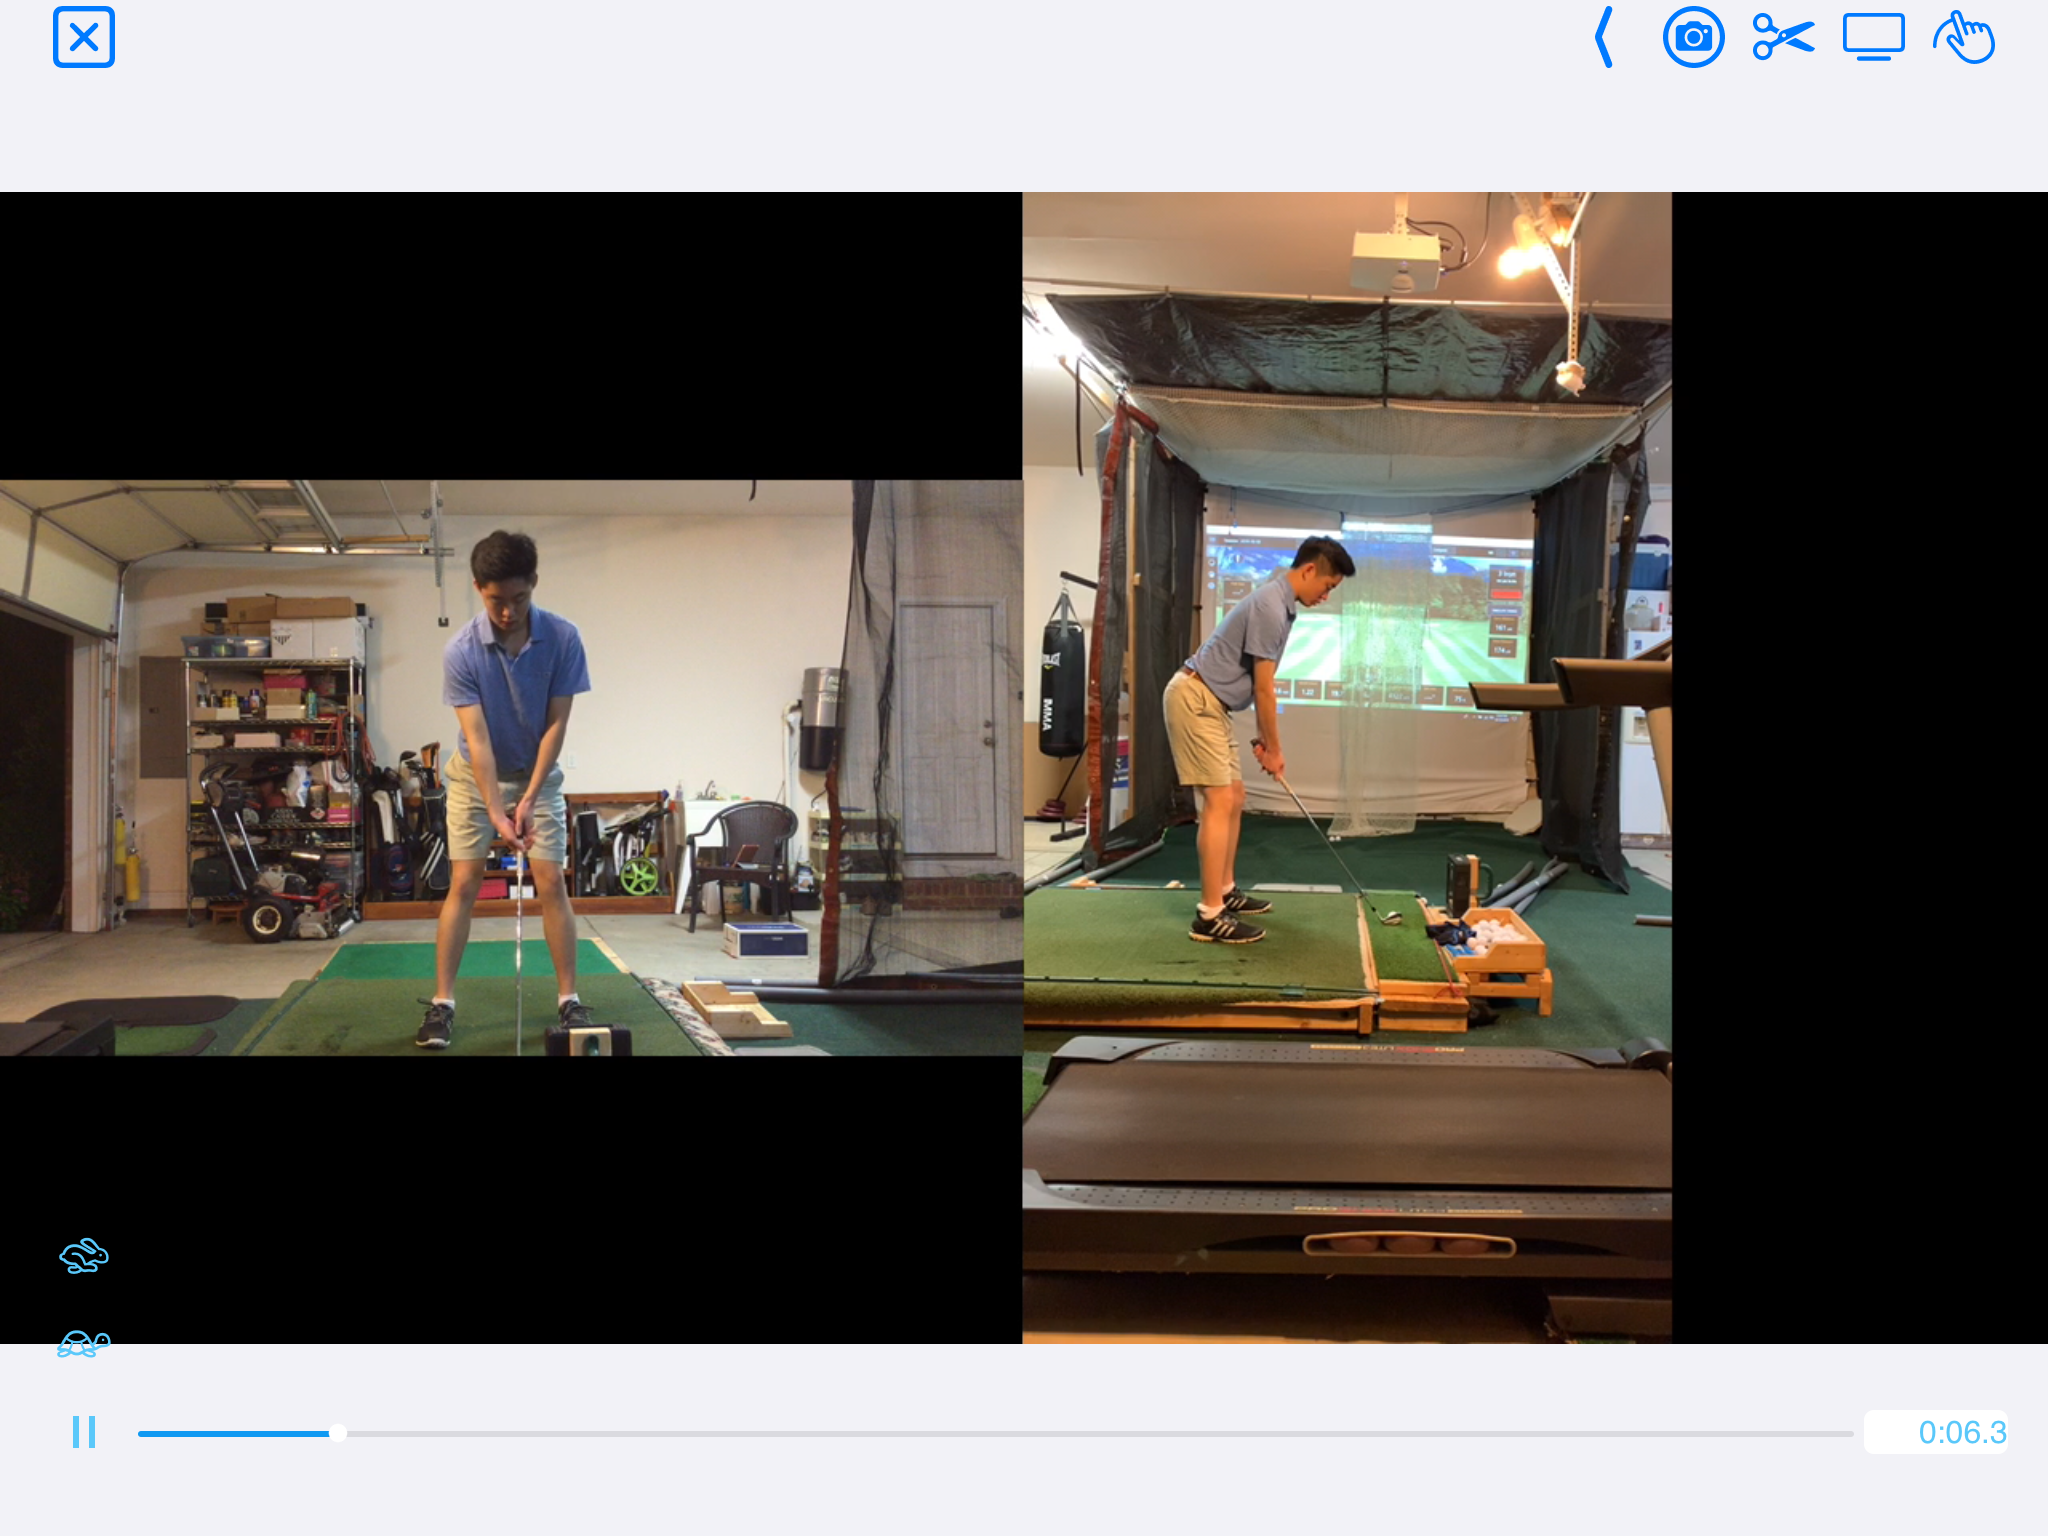
Linked Mode: Uses two devices with one set as the Main Device and the other set as the Extension Camera. In linked mode, you can take footage from both the Main Device and the Extension Camera and watch them side by side on one screen. Alternatively, you can opt to just take video from the Extension Camera and watch it by itself or compare it to a preset model swing (these options are especially useful for putting). Any videos taken in this mode will be displayed on the Main Device screen or casted to a Google Chromecast.
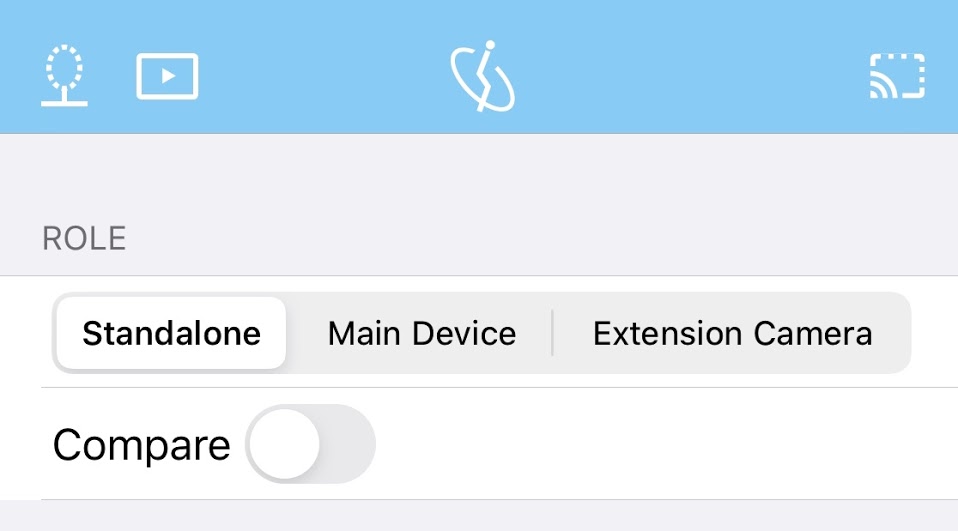
To toggle between Standalone mode and Linked mode, go to Settings → Role. From there, you can select between Standalone, Main Device, and Extension Camera. If you select Main Device or Extension Camera, your device will automatically search for another device to pair with.
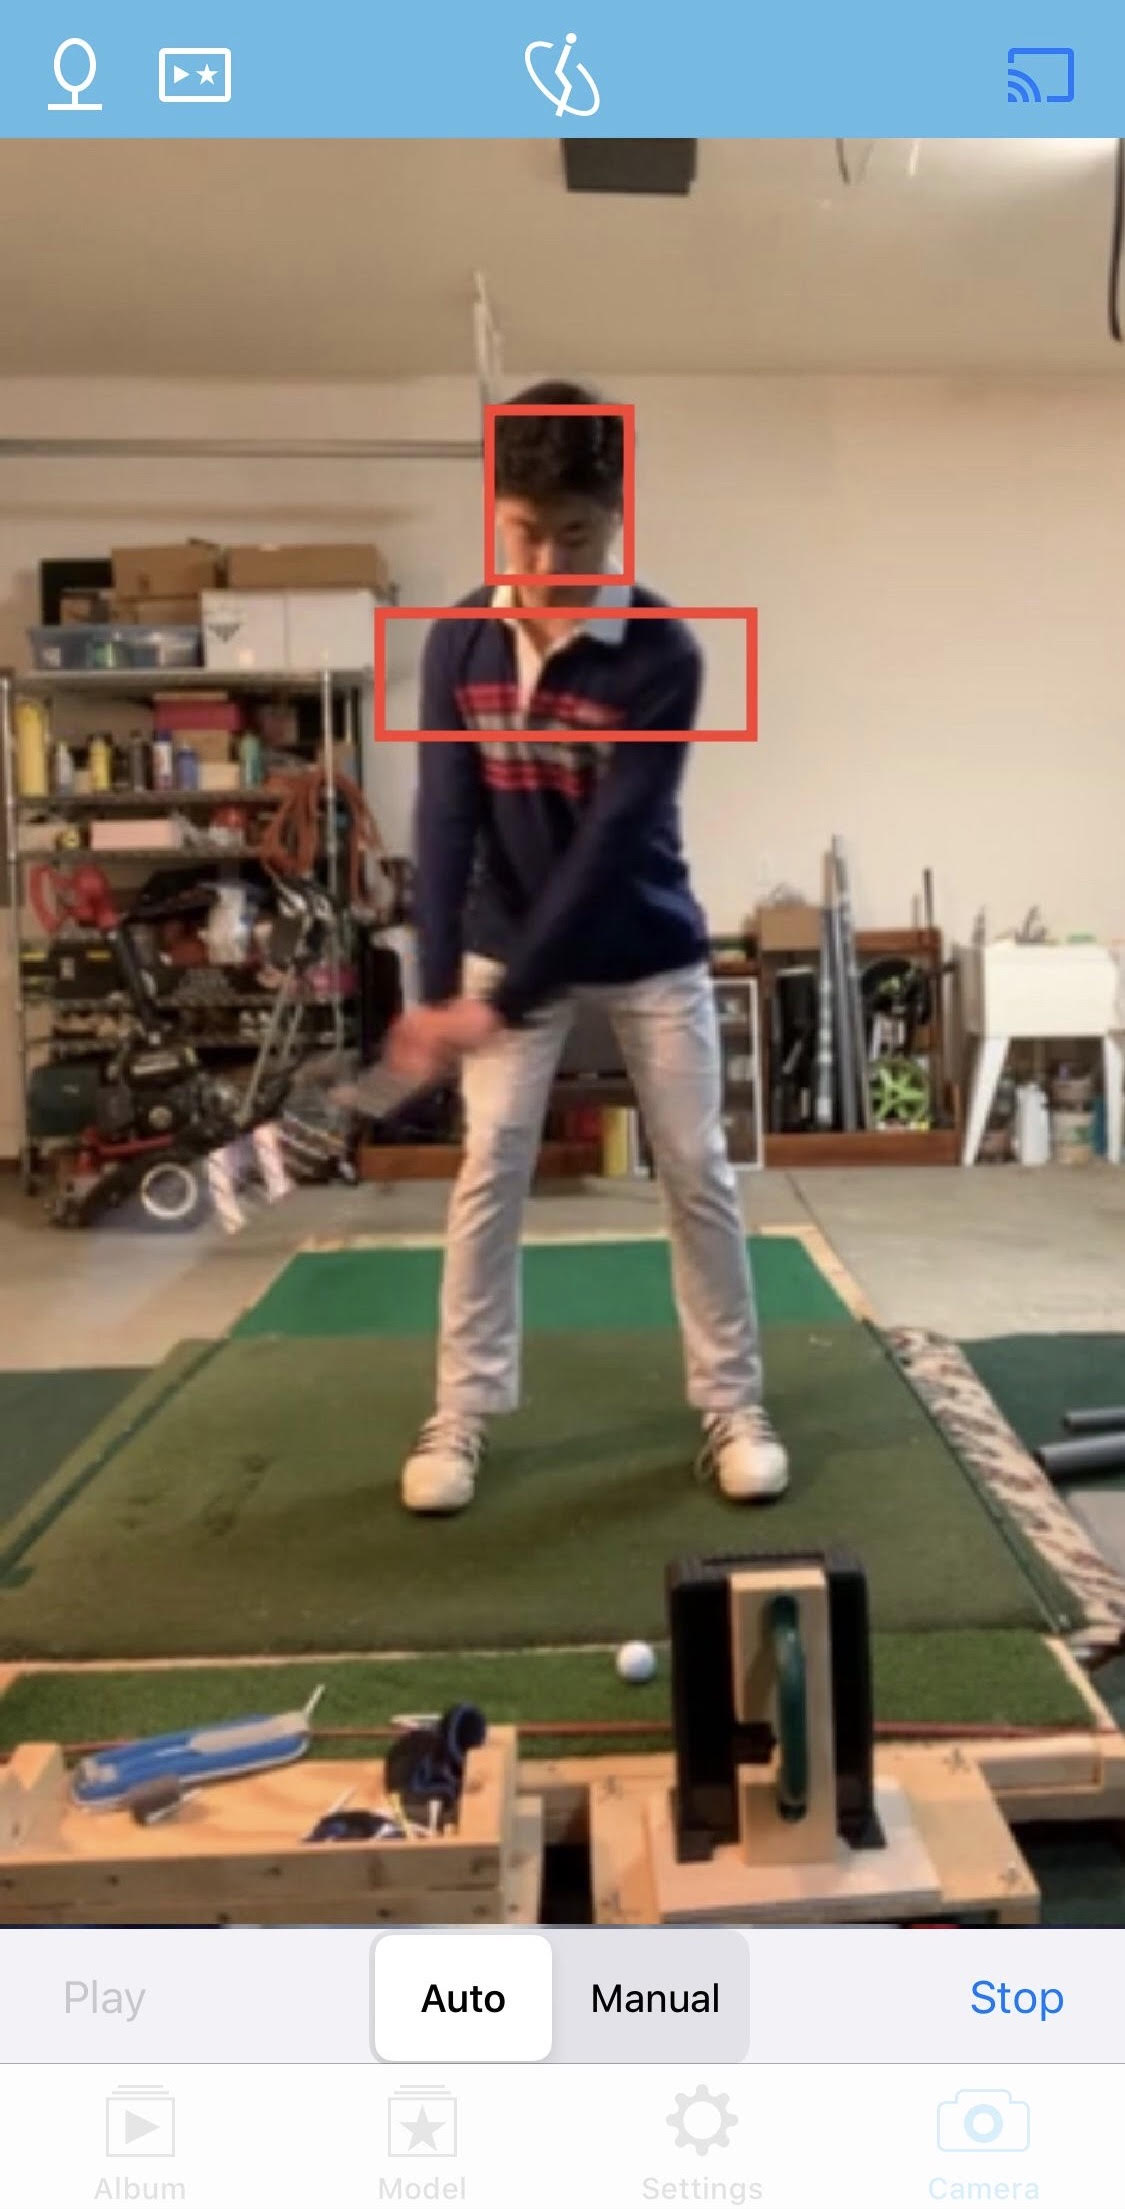
You can choose from either motion-start or face-start to best fit your practice routine. Motion-Start mode will start recording once you begin swinging. Face-start will start recording after a preset period of time once you set up to the ball.
IMPORTANT NOTE: You can stop a recording in progress by moving out of range of the camera (such as suddenly moving sideway or upwards [if the Head Range setting is not off]). If you accidentally trigger a recording when you don’t want to, use this trick to stop it.
To choose between Motion-Start and Face-Start, visit Settings → Auto Record → Motion Start/Face Start toggle switch.
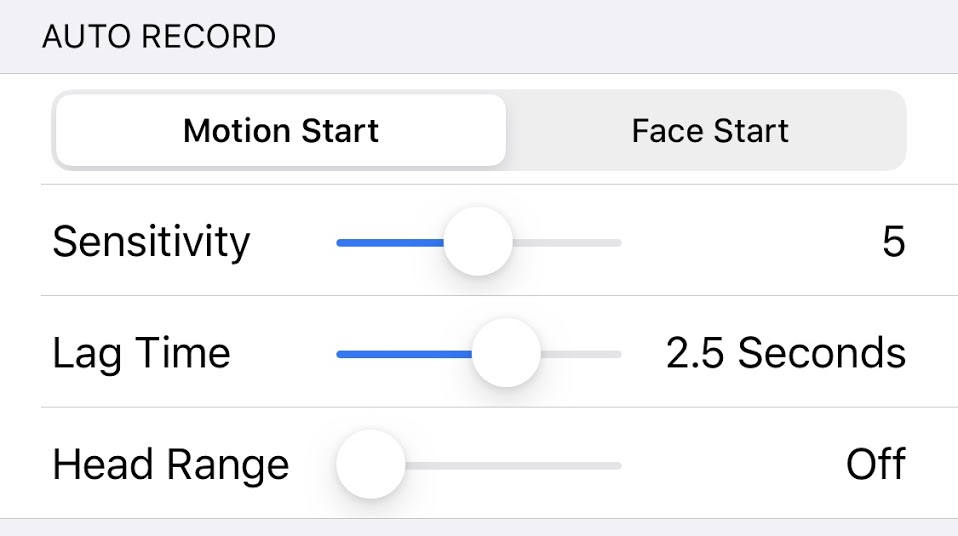
Under the Motion Start option, you have three settings:
Sensitivity: Controls how sensitive the Motion Start capture is. A sensitivity of 0 (Lowest) means that you will need to move more to trigger the recording, alternatively a sensitivity of 10 (Highest) means that you won’t have to move much to trigger the recording. You are encouraged to experiment with different sensitivities to determine which one is best for you.
Lag Time: The length of video recorded before the detection of motion.
Head Range: The amount of vertical movement needed to void the recording of the swing. If you accidentally trigger a recording when you don't want to, it is useful to use this feature to cancel it (see the IMPORTANT NOTE).
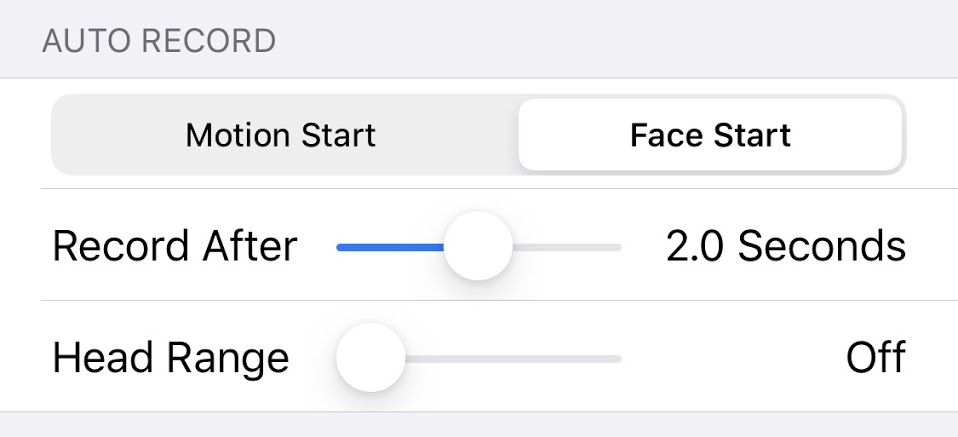
Under the Face Start option, you have two settings:
Record After: The amount of time the camera will wait to begin recording after it detects that your face is still. For example, if set at 2.0 seconds, the camera will begin recording your swing 2.0 seconds after it detects that your face is still.
Head Range: The amount of vertical movement needed to void the recording of the swing. If you accidentally trigger a recording when you don't want to, it is useful to use this feature to cancel it (see the IMPORTANT NOTE).
You can tailor SwingCast to your practice routines by customizing video playback settings, which lets you automatically view your swing multiple times at various speeds.
To adjust playback, go to Settings → Instant Playback
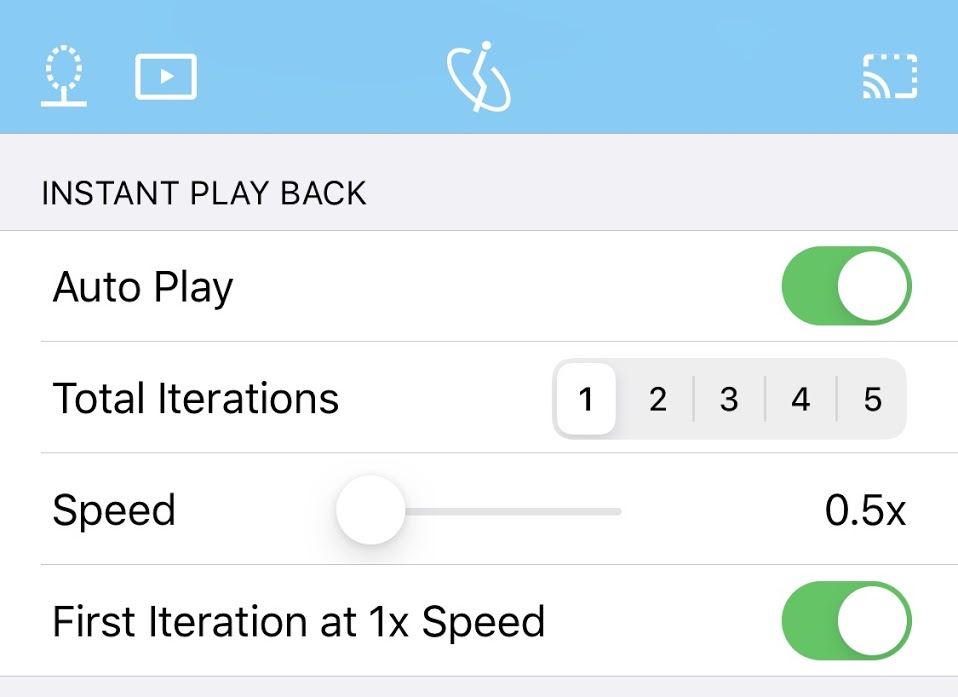
Here is a summary of what each control does:
Auto Play: Automatically replays your swing once it is recorded. Toggle it off to disable this feature.
Total Iterations: The total number of times your swing will play once it is displayed.
Speed: The speed at which your swing will replay at once it is displayed. 0.5x means half-speed, 1x means normal speed, 2x means double-speed, etc.
First Iteration at 1x Speed: The first time your swing plays back, it will be at 1x speed.
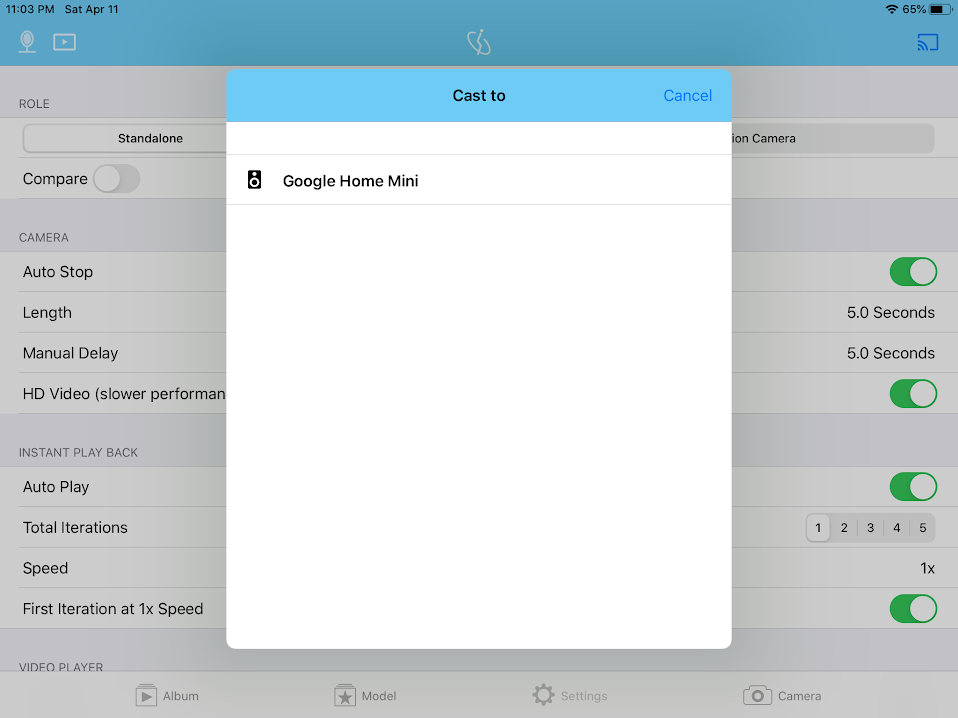
1) Click the cast button at the top right corner of the screen.
2) Make sure your Chromecast device is on. It might take a few moments for your device to recognize your Chromecast. If a Chromecast is detected nearby the cast button will turn blue.
3) Select your Chromecast device in the selection menu to connect your device.
4) To display your swing on both your device and TV (Google Chromecast), go to Settings → Video Player → Dual Play and toggle Dual Play on. To only display your swing on your TV (Google Chromecast), toggle Dual Play off.
5) To end a Chromecast casting session, tap the cast button then select "Stop the Session" in the popup that appears.
You can use your voice to navigate major features and functions of SwingCast!
Here is a list of what you can control through voice commands:
Note: If you would like to use voice commands to record videos, it is recommended to switch your recording mode to Manual. However, voice commands will still work with both Auto and Manual mode.
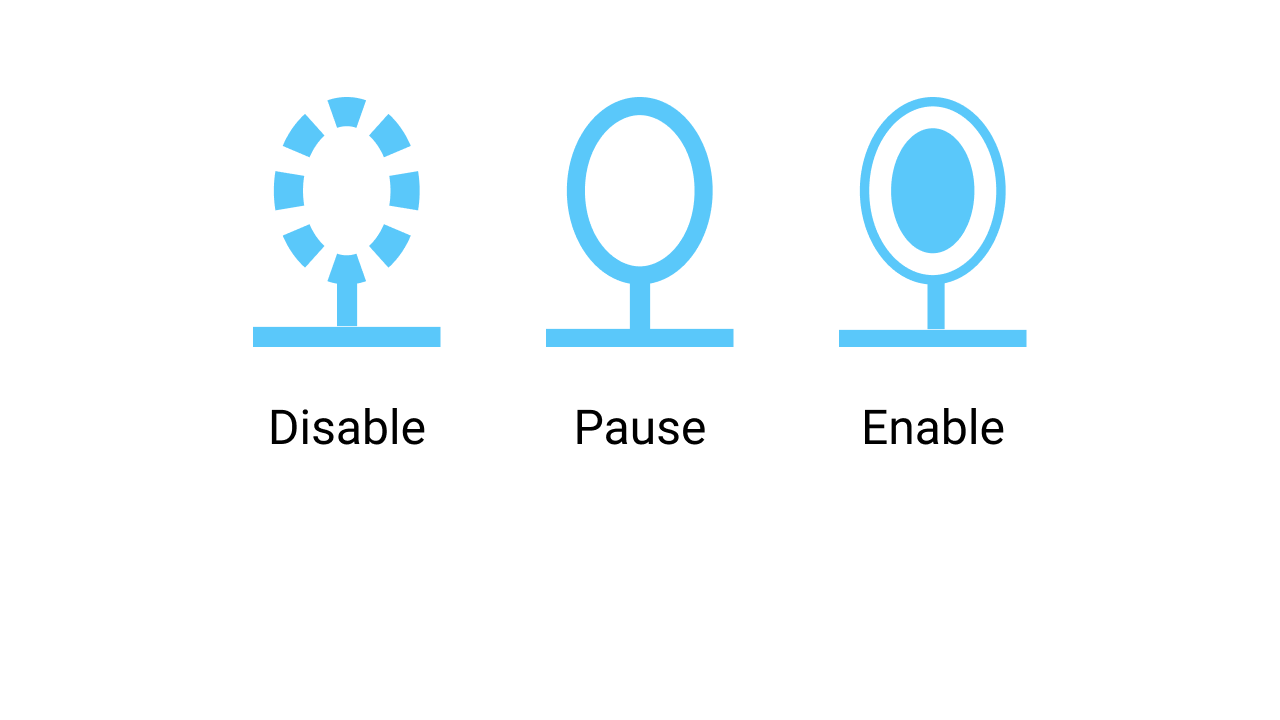
To turn voice commands on/off, click the microphone icon at the top left of the screen or use voice commands.
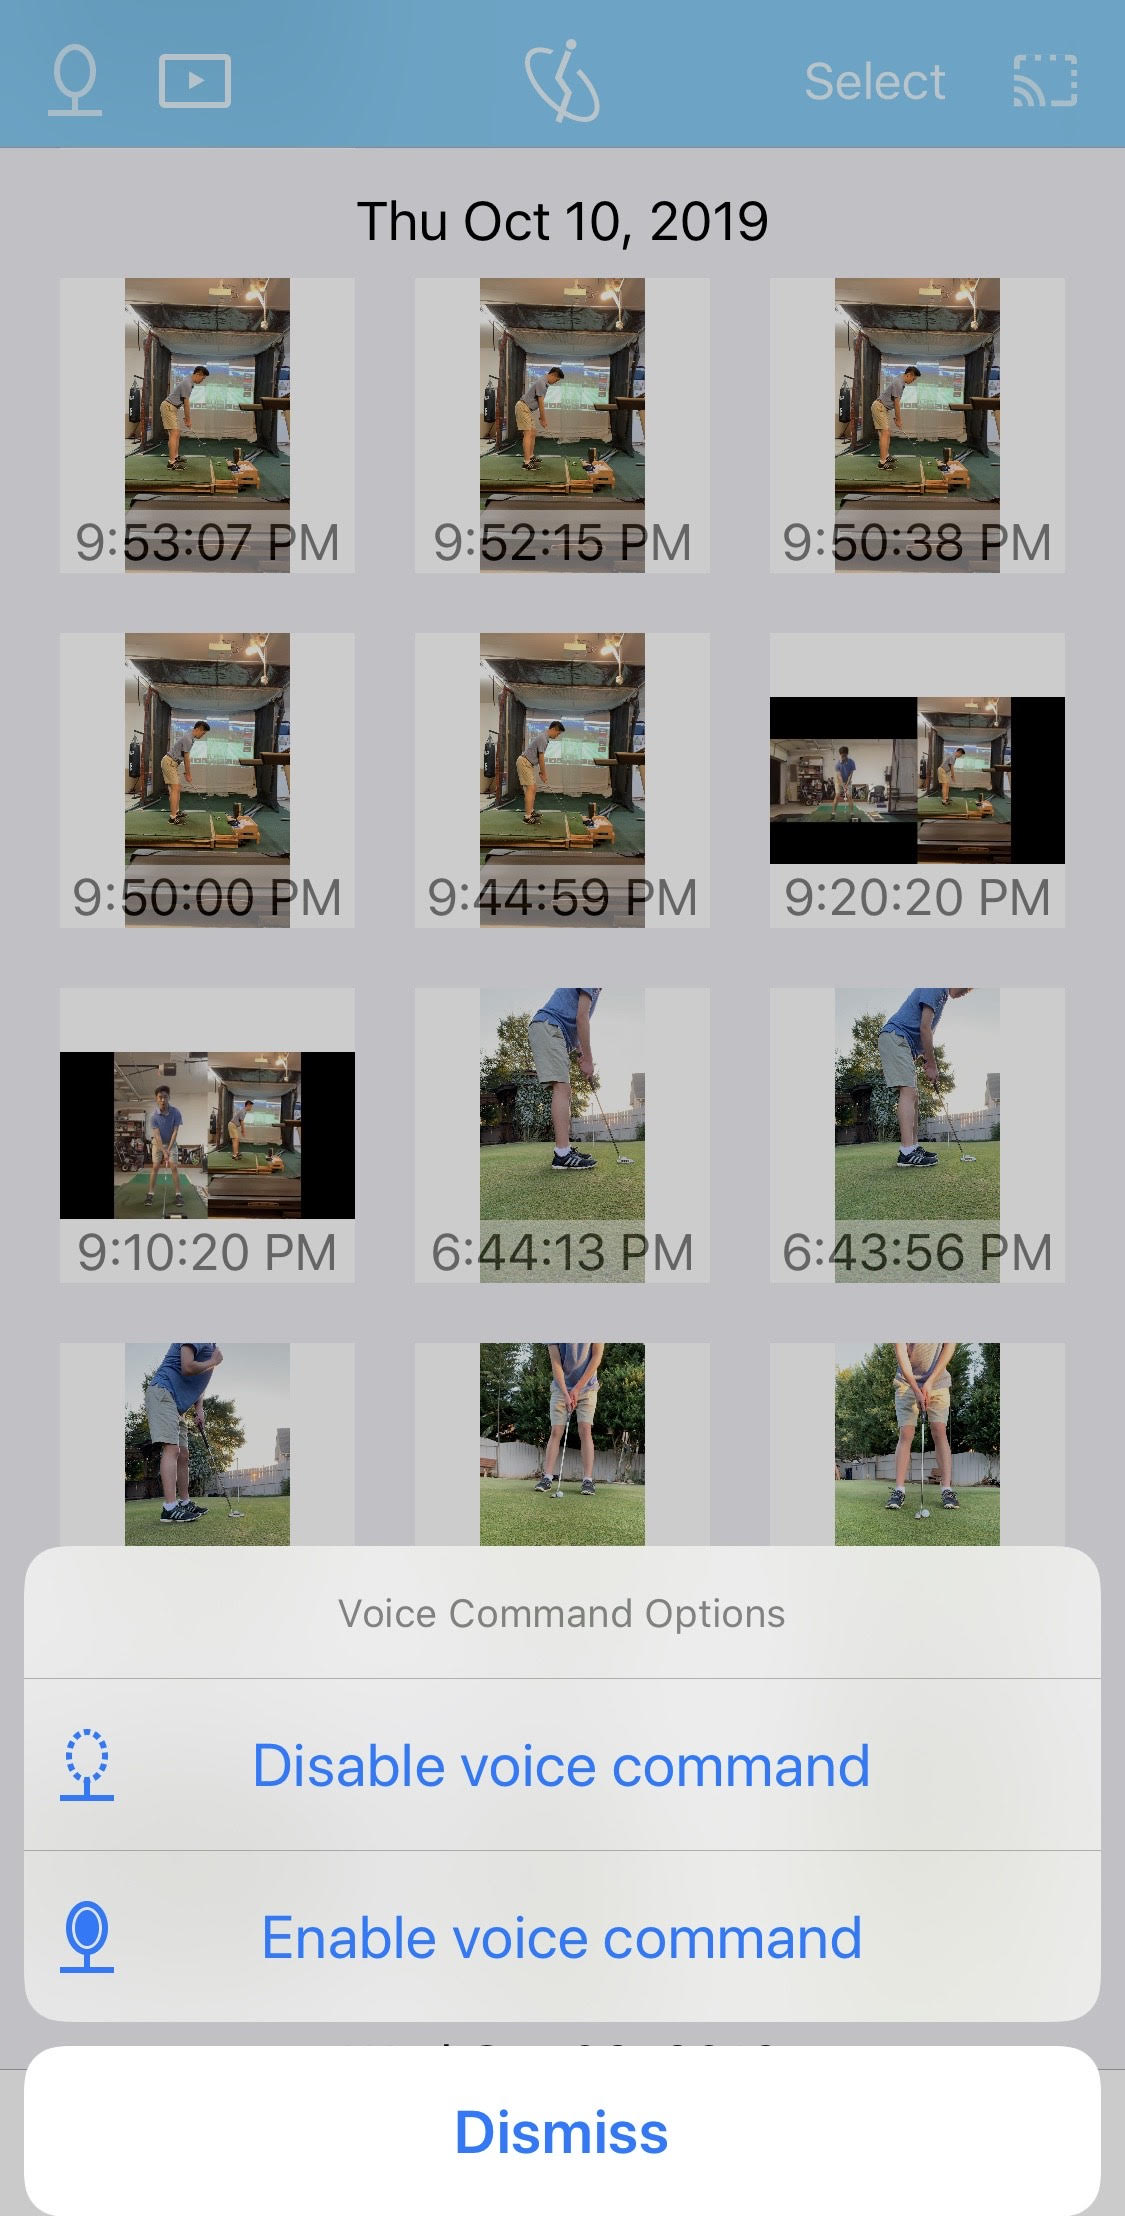
Selecting “Disable voice command” (the microphone with a dotted outline) will disable voice commands completely.
Selecting “Pause voice command” (the empty microphone with a solid outline) or saying "Pause voice command" will stop voice commands but keep listening for the trigger “Voice on.” This setting is useful in situations where you are away from your device and would like to temporarily pause voice commands. You can unpause it with your voice by saying "Voice on."
Selecting “Enable voice command” (the completely filled in microphone) will turn on voice commands.
1) To customize the trigger words for voice commands, visit Settings → Voice Commands → Set Up Custom Voice Commands.
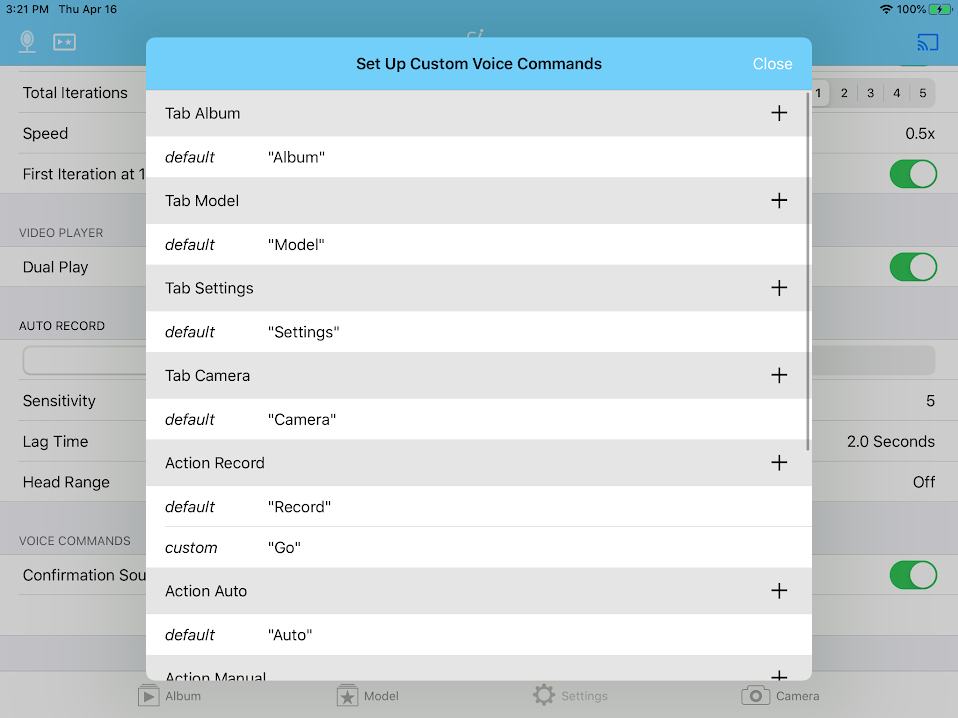
2) Once you click Set Up Custom Voice Commands, you will see the interface shown above (It will look slightly different on an iPhone). Click the + icon to the right of the command you would like to change.
3) Say your desired trigger word. Wait for it to register in the text box.
4) Click save when you are done.
1) Go to the model tab.
2) Click “Add” at the top right of the screen.
3) Select a video from your camera roll.
4) Enter a name for your video, select the position, and choose the club.
5) Click “Save.”
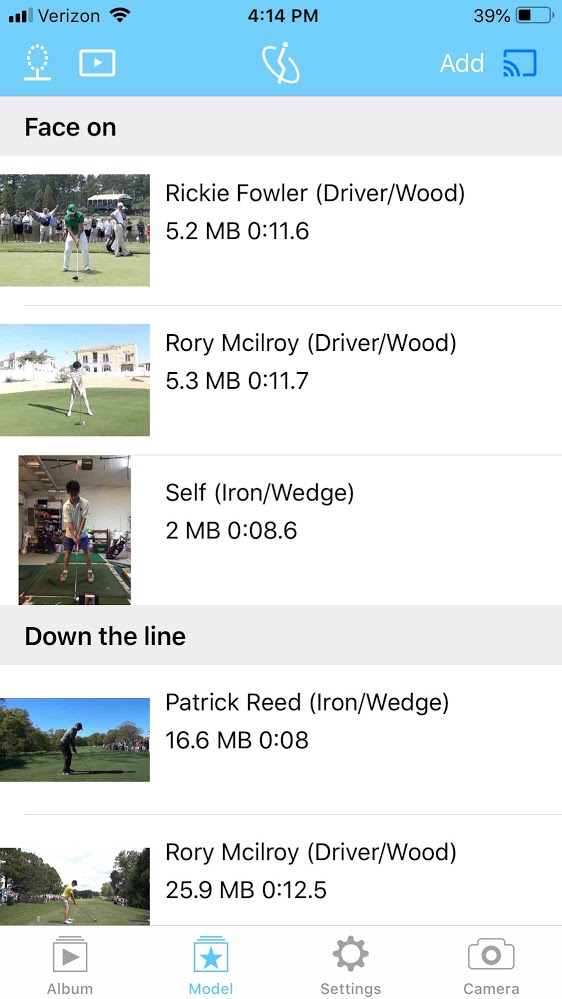
Model Swings are useful for comparing your swing to other swings such as those of professionals or other videos from your camera roll.
You can use model swings in two ways:
1) Compare them to album swings in the album tab via Side-by-Side or Overlaid video comparison. See How to compare videos: Side-by-Side and Overlaid video comparison for more details.
2) Directly compare them to your recorded swings during video playback. To do this, go to settings → Role → Turn the “Compare” switch on. Click “Select Model” and select the swing you would like to use to compare.
If you would like to delete or edit a model swing, swipe left on it in the model swing tab. Options to edit and delete that video will appear.
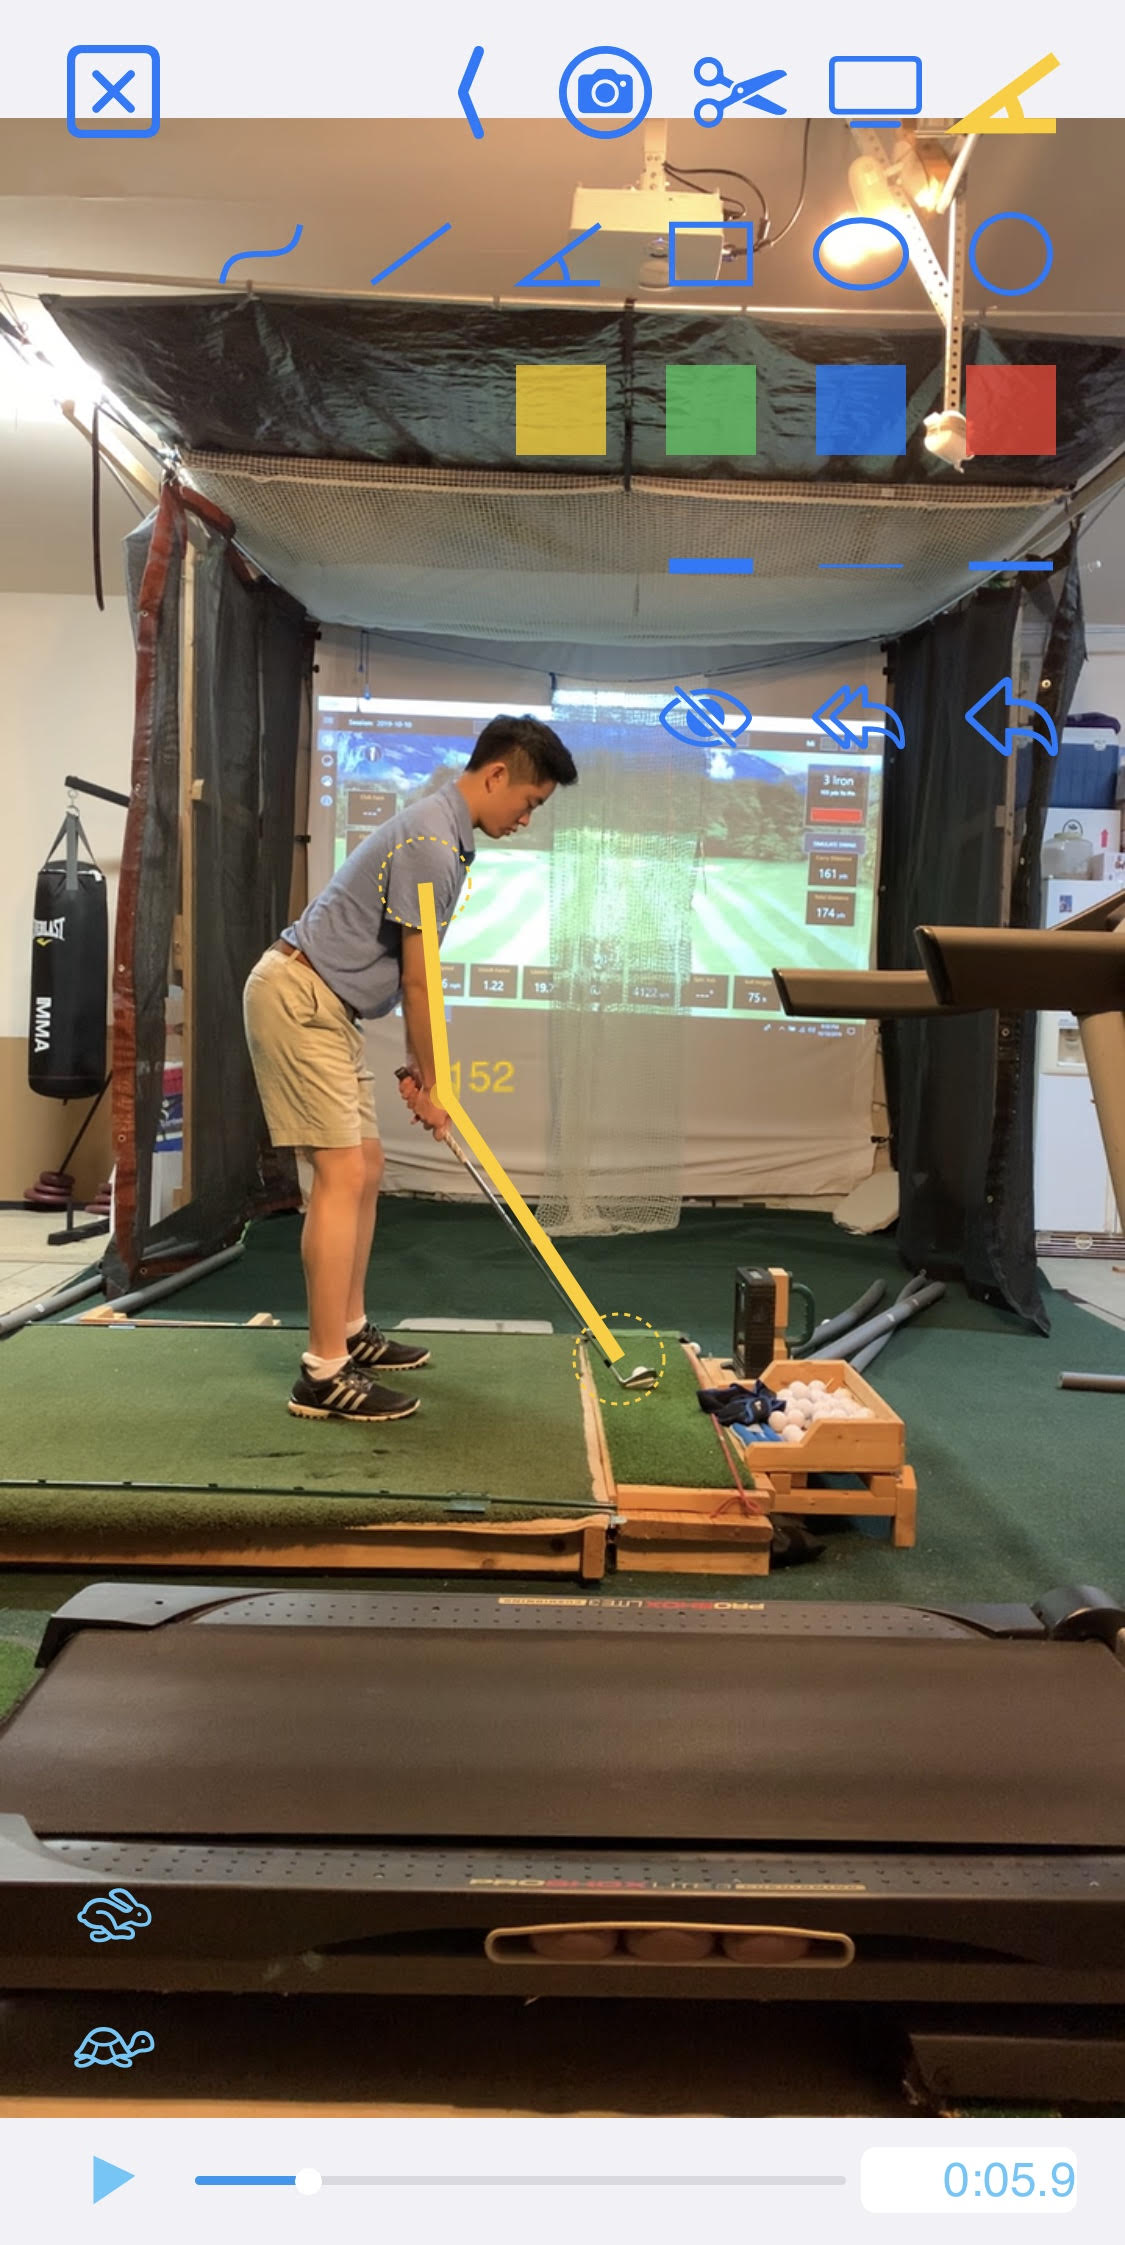
You can draw on your videos in the Album to further aid you with your swing analysis. To access the drawing feature, click the hand icon on the top right of your screen.
Note: You can only draw on videos in the Album Tab, not instant playback videos from the Camera Tab.

There are 4 rows of drawing tools:
The top row controls shapes. The second row controls color. The third row controls line thickness. The bottom row features the hide drawing, undo, and delete all buttons.
To draw, simply select the shape, color, and thickness that you would like your drawing to be and begin!
Tip: To move and/or adjust a drawing, tap on it to “select” it and drag it to where you would like it to be. To “unselect” a drawing, double tap on it.
SwingCast offers the useful ability to directly compare videos in your album to other videos.
There are two modes available to do this, Side-by-Side and Overlaid.

Side-by-Side: In Side-by-Side video comparison, your video will be played directly beside another video of your choice. You can choose from either the same video, another video from your album, or a video from your model swings list (imported from camera roll). Feel free to drag around the videos to get an optimal viewing angle!
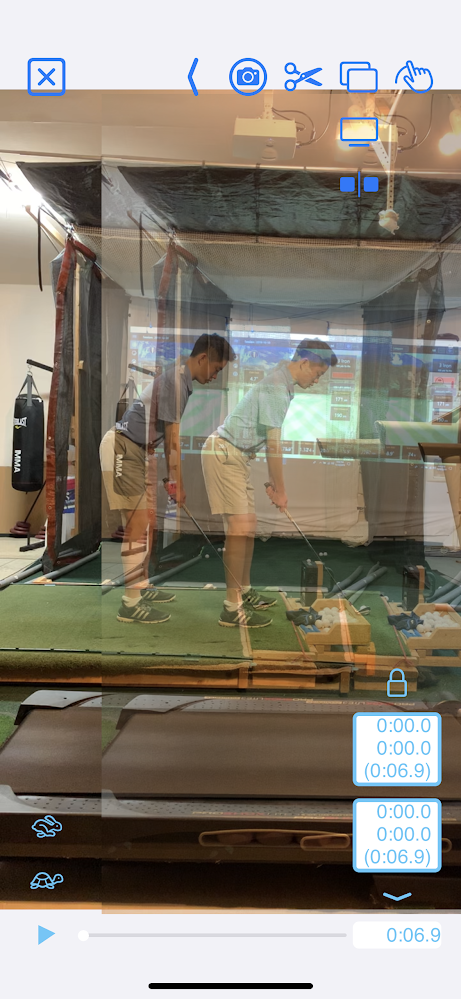
Overlaid: In Overlaid video comparison, a video of your choice will be overlaid directly on top of your current video. You can choose from the same options as the Side-by-Side mode: the same video, another video from your album, or a video from your model swings. It might be useful to drag the videos around to properly line them up.
When comparing videos in either mode, you will see two boxes appear on top of the video timestamp at the bottom right hand corner. The top box controls the playback of the original video. The button box controls the playback of the new video. When a box (or both boxes) is highlighted, the video scrub bar will control that video.
You will also see a lock above the two boxes—this allows you see which video is being controlled at a time. An unlocked lock facing to the left means the original video is being controlled, an unlocked lock facing to the right means the new video is being controlled, and a locked lock means both videos are being controlled.
Finally, the save icon located above the lock icon allows you to save this video to your SwingCast album.
1) Click the scissors icon at the top right of your screen. Two boxes labeled Start and End will appear on top of the video timestamp at the bottom right hand corner of your screen.
2) Play (or drag) through your video until you reach the point where you want your cropped video to start. Then, click the Start box.
3) Continue playing your video until you reach the point where you would like your cropped video to end. Then, click the End box.
4) Click the save icon located above the start box. If you would like to stretch your trimmed video into a different length (e.g. you have three seconds of video frames but would like it to be displayed for 5 seconds), input your desired length into the text box that appears. If not, simply ignore this box.
5) Click “Save to SwingCast Album” when you are ready to save your video.

Recording your screen allows you to save your drawings on your video. While you could screen record videos with the built in iOS screen recorder, SwingCast’s screen recording module saves the videos in your SwingCast album instead of your camera roll.
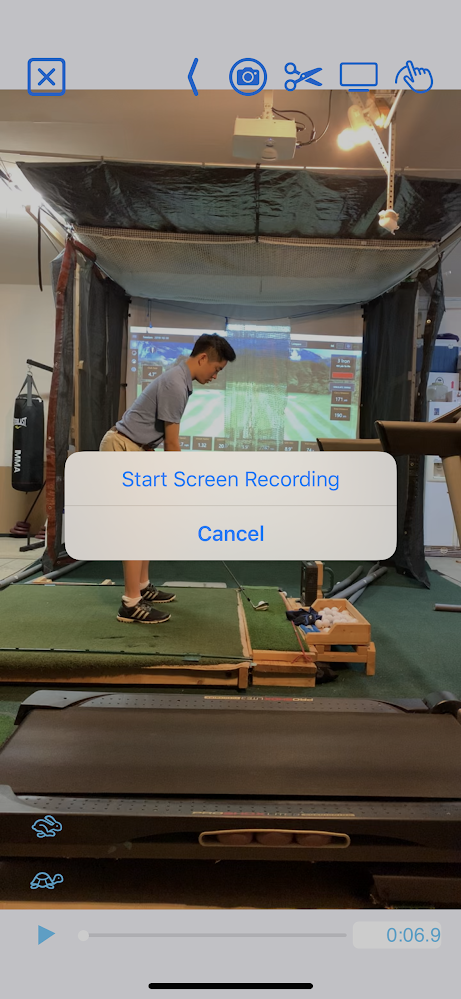
1) To screen record, click the camera icon at the top right of your screen.
2) Click Start Screen Recording to begin recording your screen.
3) Once you are done, click the red circular icon to stop recording. Your video will be saved to your SwingCast album.
The SwingCast's default operation mode is the Standalone mode.
Standalone involves only one iOS device. You record video with that device and either display that video on that device or on a Google ChromeCast enabled TV if connected. You also have the option of automatically playing your recorded video side by side with a preset model swing of your choice.
Please look at the How-To guide for Standalone vs Main Device/Extension Camera for more information.
No. If only one device is in use, you need to use Standalone mode. Go to the Settings tab and switch your device role to Standalone. Alternatively, you can tap on the role button in the navigation bar and switch from there.
Go to Model tab, left swipe the selected video and choose the Model option. There is only one preset model at any time. Alternatively, you can go to Model tab by tapping the Select Model button in the Settings tab, ROLE section (when Compare switch is on) and then select preset model.
If you are using linked mode and/or casting your session to a Chromecast, it is generally not a good idea to use the HD video option. The HD Video option will greatly increase the file size and processing and transmission times of your videos, which in turn will slow down the speed of the app. Using the HD option in Standalone mode is usually fine performance wise, but will take up large amounts of storage on your device. You are only recommended to turn on the HD Video option when you need high quality video.
Go to Settings → Confirmation Sound and toggle it off.
Since there is a cap on the amount of voice service that Apple will provide for each free iOS app per time unit, it is possible that the voice command will be temporary out of service if too many users are using SwingCast's voice command feature at the same time. Please wait a short time and try again.
Also, if the surrounding noise around you is too strong, the device may not receive your voice well, causing the voice command to not work.
If voice command does not work, you can still use the auto-start or manual-start options to trigger video recordings and navigate the app manually.
 Hi! I'm Jeffrey Zhou, a Computer Science student at Duke University and the creator of
SwingCast.
As a golfer, I have always found that I improve the most when I could record my swings, especially from different angles, and subsequently analyze them. However, I couldn't find an easily accessible product on the market that allowed me to capture my swings from different angles simultaneously. Thus, I decided to make SwingCast—an iOS app that allows golfers to automatically record and watch their own swings from different angles. With a variety of features such as robust video analysis tools and voice navigation, SwingCast provides the complete package for golfers looking to add analytics to their game and streamline their practice routines.